Saturday, April 21, 2012

Tape and Float

Again, the pictures tell the story. One crew did the hanging, a different crew did the tape and float and I was told another crew will be back on Monday to do the texture.  All have their specialties.


Since the ceiling of the Great Room will be covered with wood flooring, it is probably not needed to have it floated but I thought, oh well, the tape and float will help with sealing air leaks and the project price had already been agreed upon.  I will probably tell the texurizing crew not to put texture on the ceiling.


I wanted the rounded corner supports as opposed to the older method of making a sharp edge.


All edges on and first layer of the float on the Dining Room side of the Central Pod.


Kitchen.  I bought two sets of these Halogen lights and the crews wouldn't use them.  I thought it would give them better light since there still isn't electricity or lights in the house.  They were 1000 watts and got extremely hot.


From the Kitchen looking down the hall to the Master Bedroom.


More dust in the air in the Master Bedroom looking into the Master Bath. the opening is over the soak tub and will be glass with a frosted design on it.  This was to let light into the Master Bedroom


The Tape/Float Crew had several tools that made their job go much faster.  This guy is using a long-handled taping tool that applied the tape and embedded it into mud at the same time.


Guy was applying the second coat with a wider tool.


This guy is correcting the one mistake I found earlier which was they assumed a door into the Master Closet when it was just an doorway so they went back and added the drywall on the edges and the rounded edge trim.


Garage is fully spray foamed for insulation and drywalled, taped and floated.  I don't know if I will have it textured.  Probably will since that will give a more finished look and may not have to be painted.  No additional charge for me.  Notice the furred in section at the edge that covers the big pipes for the ERV..glad I did that since it makes for a cleaner look.

From Kitchen looking into the second/third Bedroom hall.


Central Pod looking from Dining Room


Kitchen

Looking back into Kitchen from Great Room


Ceiling Popup in the Master Bedroom.  A fan with a light will be in the middle and LED rope lights with a dimmer will be around the edges behind the crown molding.


If you remember the roofing work, I was not happy with the end of the caps.  They had gaps that looked sloppy.  The crew came back (because I was refusing to pay the invoice.) and made all the caps fit perfectly.  As the guy told me, they won't be seen once the gutters are on.  But, I know they are done correctly and we will see whether or not they can be seen.  

PICKY OL' WOMAN!


We had a storm blow in from the West and brought some rain and cool, dry air.  Was very dramatic and I loved it.  The front posts have to be repainted due to another layer of hardie had to be put on the front to cover the wires for the front carriage lights.  The painters were scheduled to finish the porch ceiling and the posts on Friday but they failed to show or to let me know.  Remember there were other problems with this crew.  Not looking good for additional work with this sub. 

Hanging Drywall

Pictures tell it all.
These sheets of drywall were 4x12 - 5/8ths inch thick.  I don't know how much they weighed but I couldn't lift one sheet and this guy was putting up the sheets by himself, screwing to attach and on stilts.


Kitchen side of the Central Pod.  Spots on picture are the dust that was floating in the air.  Still had some problem explaining what needed drywall and from which side.  Especially since I wasn't sure they understood me.  The Spanish crews have a way of just saying OK then doing whatever they think is the right thing.

This series of shots show them putting up the ceiling drywall when the main guy in the green shirt could not even reach the top beam.

Found out it didn't fit.

Had to shave it while on a very shaky platform.


Both tubs and shower were surrounded with the water resistant board for tile later on.

Finished Product---at least the hanging.


Looking from Kitchen to Dining and back double doors to back porch.

Front Door

Great Room side of Central Pod--to be covered with stone.

Looking from Great Room into the opening into the Office with front door on right and hallway into Master Bedroom on left.


Pantry showing the closet with the water manifold.  Water heater will be placed on the platform and louvered doors for the closet for air circulation.

The crew did a good job but I noticed one mistake that will have to be corrected before the tape and float.  All the doors and windows will have wood returns and trim so no drywall on the edges.

Wednesday, April 18, 2012

Monday, April 16, 2012

Today is cleanup day and getting ready for the Blower Door Test.  This test will check for air leaks before the drywall is installed.  I am hoping for good readings but I know that there are two main areas of leaks I could not close up: 1.  the pipe going out the roof for the stove is about 10 inches in diameter and will cause large air movement.  and 2. the openings around the ERV tubes are a big air leak that has to be addressed.

Most of the other openings I have closed up such as the vents for the drains, vacuum system which goes into the Mechanical Room and drains for the water heater and mini-split.

The guy from Austin Green Team brought his equipment and set up the test.


The test entails creating an environment that simulates a 20 mile/hr wind blowing at the house from all directions.  Then the best way to find air leaks is to walk around the house and it is obvious where the air is blowing into the house since the lowering of the pressure in the house actually pulls air in through any place the air can get in.


The blower is placed in the closed doorway and blows outside until the pressure reaches 50 Pascals...just a way to measure the pressure.  The most accurate measurement includes an accurate measurement of the volume of the area.  Since we only knew the square feet (2155 sq ft) and guessed the height to be an average of 18 ft,  the cubic feet per min measured 1505 which meant about a 11 percent loss of air per hour.  The guy said an average house has around 35% air leakage.

Bottom line:  I have a tight house even with the holes I know about.  When we modified the volume to 13 ft average height the loss went up to 17%...still by Austin Energy Standards==a tight house that requires ventilation.  Great, because I have ventilation.  I think I can get the cfm down to below 1000 when the drywall is on but then the volume will also reduce.  It was a worthwhile test to see how much air leakage I have at this stage. It will only get better.

What was most helpful was checking where the leaks were.  Some were surprising to me but fixable with more spray foam, ZIP tape or tightening the latch on the double doors.  None of the windows had air penetration.

Drywall stocking and hanging starts tomorrow.

Friday April 13, 2012

Oh no.  I hope Friday the 13th isn't going to be an unlucky day for me....I think that was yesterday.  This is now the 4th day of insulation and I hope to get finished today as I know Johnnie and Ryan are as well.  They were able to begin spraying around noon.


Ryan did me a favor and sprayed around the bottom of both tubs.  Remember the tub that had to be replaced?  This is the new one and it can be seen where the support was cut to put in the outlet box.  Right behind the box was where the hole was punched in the old tub.  At least now, we could get more foam on the tub to keep the temperature consistent for bathing.


This shows the wall between the envelope and the garage.  With the 1 inch of foam on the garage side and this 2x6 wall, there is about 6.5 inches of insulation plus the 5/16 OSB --should keep the heat coming from the garage from entering the house.


Good picture showing up the wall into the attic.  The wall foam will be shaved back to the edge of the 2x6's so drywall can be attached to the wall and ceiling.


This is the back of the second tub where the supports weren't cut out even though there is an outlet on this wall as well.  Strange, huh, how differently the two tubs were installed..same size and type.


This was an attempt to get into the header over the window.  I don't think it worked since the headers don't have much space between the boards and there is a cap at the top.  Made me glad that I had used the outside panels that had 1 inch of foam to break the thermal bridge of the wood to the outside.  


I was taking pictures in the house while Ryan worked in the garage when I noticed a gaping hole to the roof over the back porch.  It was kind of hidden behind the headers for the double back doors.


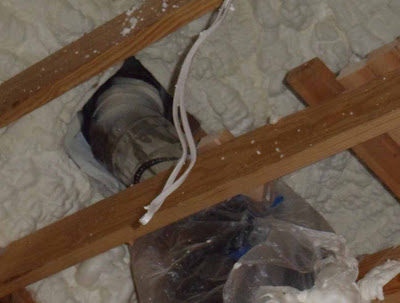
I took a closer picture and the hole was about 2 feet by 2 feet.  Here I was worried about air leaks coming through cracks and I have a 4 square foot opening dumping hot air from the porch into the "sealed" envelope of the house.  It was like trying to sip from a tiny straw then turning around to be hit in the face with the power of a 2 ft diameter fire hose.  This hole will be fixed.  I also noticed light coming through the wall where the ERV hoses go into the Mechanical Room.  I will have to figure out what to do about those leaks into the attic.


This is the completed ceiling of the Great Room.  The 2x6s need to be scrapped since they will be covered with drywall before the wood flooring is placed on the ceiling.  Yes I know, that is upside down....but just think--no footprints, polishing or cleaning.


Foam around the stove pipe.  Ryan did a great job of keeping the foam away from the pipe.  Even though the manufacturer says the foam won't burn, I didn't trust it and the foam is at least 6 inches from the pipe.


Also on Friday, the sofitt guys came to finish the ceiling of the front porch which had been delayed until the rock could be layed to support the gable above.  Antonio also pushed the wires into the front posts by routing the hardie out and topping the posts with another strip of hardie.  No one will notice the difference in the width of the front two posts but they will notice the lights yet to be placed on them.

Now I need to get the painters back to finish the painting.  All this work was done without delay because I had withheld partial payment of both the framer and painter until the work that depended on other subs was completed....great lesson from my consultant, Built Green Custom Homes.

Thursday, April 12, 2012

Thursday we had visitors to the site to show off the foam plus work started kind of late since Johnnie and Ryan travel all the way from Canyon Lake.  Things had begun to move along when a valve on the equipment broke.  The valve had to be brought in overnight from Dallas to San Antonio.  Johnnie was to pick it up in San Antonio and be back on my construction site on Friday.  Considering he has to wait for the delivery and drive from San Antonio, I don't think I will see him till after noon on Friday.

In the meantime, the supervisor for the roofing job came by for final inspection and release of payment for the roof.

What do you think of this trim.  Remember, I can get really close with my little camera.


This is just one of the corners.  All of them were similar since they weren't tight to the drip edge.  The Quality Roofing Supervisor, Taylor, said it wouldn't effect the purpose of the cap which was to divert water over the edge of the drip ledge but I thought it looked like sloppy work and was so obvious.

He tried to talk me out of fixing it but I insisted and now payment is withheld until all the corners and valleys are to my eye -- "professional".

I am getting tough!   Not really, sometimes I just play the dumb ole woman card but what works is not paying them until I am happy.

Wednesday April 11, 2012

Day 2 on the spray insulation.


Johnnie Brown owner of ENERGY MASTERS and Ryan in his protective outfit.  Johnnie told me his trailer which even has its own compressor and air conditioner cost over $150,000.  The tubes hanging on the wall behind Johnnie deliver the material is under high pressure.


This is the Master Bedroom with the first spraying on the walls.


Solar Tube going up through the roof showing how deep the foam is.  


Ryan tried to make a pretty pattern to show off the foam.  I think he succeeded.


Foam draped down over the top plate.  It was 8 to 10 inches deep in some places which gave me an R value of around 35 with just the foam.


Looks good enough to eat. Reminds me of whipped cream.


This is a little hard to understand but the view is looking all the way up to the peak of the roof which we figure to be about 25 feet.  Can you imagine Ryan walking these rafters with  hardly any support and in a sweat suit with a face mask while dragging a heavy hose.


Can you see the ladder?  Not sure what Ryan was trying to do but getting the spray on the multiple pitched roofs was quite a task.  Ryan did all the spraying and is very key to Johnnie's operation.  Great worker!